Welcome back to another D.I.Y (Do It Yourself) session dear readers! Today I'm gonna guide you on how to replace a faulty reverse switch on a Perodua Myvi (The steps applies to most cars as well).
How To Identify A Faulty Reverse Switch?
- the reverse light/reverse sensor doesn't comes out when you engage your gear into reverse.
- the reverse light/reverse sensor doesn't turns off when you disengage your gear out from reverse.
*be sure to check all the fuses before you decided to change the reverse switch*
In this case I'm working on, the reverse switch wires was chewed up by puppies so both of the wires was touching and it kept the switch in the closed position and the reverse light/reverse sensor on even the car is travelling straight.
Thing/Tools You'll Need.
1. A car jack
2. Open end wrench (size 24mm for Myvi)
3. Replacement reverse switch (can be purchased at autoparts shop below RM 70)
4. Transmission Fluid
5. A container to catch the transmission fluid.
Step By Step Guide.
1. First tings first, locate the position of the reverse switch. For Myvi, its located on the front side of the gearbox facing the radiator with 2 wires connecting it to the wiring socket. For 4g9x (Mitsubishi) engines, its located on the top of the gearbox.
2. Once you've located the reverse switch, jack the car up (if you have to) and use a jack stand to hold the car in place.
3. Unplug the reverse switch from the socket and using the open end wrench, unscrew the reverse switch counter clockwise. Be advise to standby a container to catch the transmission fluid as there will be transmission oil oozing out from the hole once you've remove the reverse switch.
4. Once you've removed the switch, replace the faulty switch with a new one. and repeat steps 3 in reverse.
5. Once you've tighten the reverse switch, secure all cables and make sure there's no dangling wires.
6. Refill the transmission fluid and you're good to go!
That's all for now! Hopefully there's more D.I.Y posts for all of you soon. Have fun doing it yourself and be safe always!
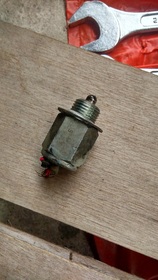
Faulty reverse switch
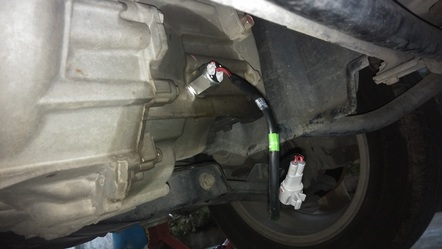
New reverse switch in position.
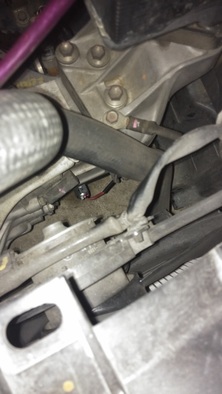
top view of the reverse switch. Bottom in the picture is the radiator
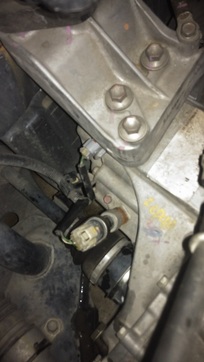
All wires secured and sockets plugged in!
 RSS Feed
